OK I put a few photos of this boat build on my
Facebook page.
http://www.facebook.com/photo.php?fbid=1842760746879&set=a.1842753706703.135402.1176411887#!/profile.php?id=1176411887
Dam
that's a big www.spot.

Now there is no Strong back to build this boat on, the idea is that the bottom sheet of ply when cut and braced with the keels will hold the whole thing together .
I have a work bench to build on it is an 8ft x 4ft deck (bench) but it is only as high as my knuckles on a closed fist.
Let me explain.. A Blacksmith uses an anvil to work on and the height of his anvil top is equal to where his knuckles would be on a closed fist with his arm straight down his side, so stand up straight put your arm down the side of your body close your fist and where your knuckles are is the best working height for any bench you need to work on,..E.G. best height to place a bit of timber to hand saw at ( get a set of saw horses and they will be very close as they are made at an average mans height to his knuckles) Now you may be a bit shorter or even a bit taller than what some saw horse maker feels is average but you will be close.
Anyway enough dribble.
Take 1 of the 4mm sheets of ply and find the centre line
lengthwise give or take a
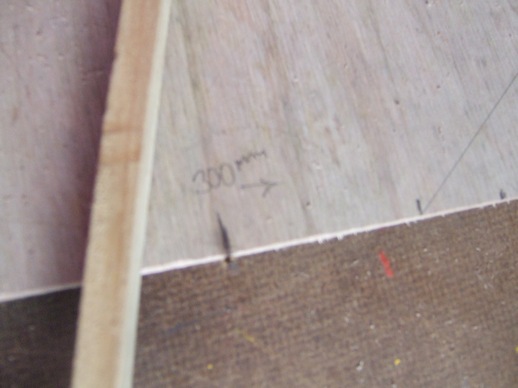
smidge and draw with a straight edge a line down the middle of the sheet. photo above is wrong as it should say 601mm to the side. (not sure where I got the 300 from)
Next find a spot next to the line and at 1 end write (F) now you have the
Front end of the sheet or BOW.
Now from the (F) on the line mark a spot on the line 600mm back down the sheet.
Get out a saw and cut this line from(F) to the spot 600mm down the sheet.

So I missed the photo of the saw cut (sorry).
next put a small nail into the point where the cut finished and then back at (F) put a nail 150mm either side of the line (
that's where the 300mm came from) now take a thin bit of wood longer than the length between the nails at(F) and the nail at the end of the cut, (this bit of wood has to be
flexible) draw a straight line from the nails find the center of the line from the centre point mark a point 12mm towards the center line of the sheet (where the saw cut is)then replace the bit of timber and push the center of the timber (where the center of the line is )and bow it
until it touches the point 12mm out now run a pencil along what is a new line (giving you a small curve, do the same on the other side again drawing the new curve line.
Now cut along both of these new lines (jig saw or in my case a Japanese saw Very
Flexable)).
Now as you can see in the above photo you cut off 150 mm right across the sheet at the (F) end.
next get some strong cable ties and drill 6 holes down what is left of the main sheet first is 50mm from (F) and the next 2 are 100mm apart.

Make the holes just big enough to take the zip ties.
Pull the sheet up so the two cuts meet, pull up the zip's and bingo you have a nice little curve up to the bow of your hull.
I then got some fine copper wire and drilled a series of holes next to each other either side of the join, cut the wire into small sections (lengths) and just put either end of the wire up through the holes and twist tight with a pair of
pliers.
and it now looks like this..


 I also gave it a Tumblehome, This 1 is very pronounced as it is centered on the center of the bottom of the sheet, if you would like you can go straight up for the sides ( this may make the gunnel a bit weak as there is no strength in untorched ply) or if you like a less curve run your Tumblehome arc from the far side ..(again this may be weak).

 So now I will put on the Main keel
 I used a spray bottle to get the joint wet gave it a few seconds and then just ran the glue along the joint after a while it starts to foam up and even pushed the tape on the underside away from the joint.


 This will go off hard as nails but will cut and sand and paint.
 Now there is no Strong back to build this boat on, the idea is that the bottom sheet of ply when cut and braced with the keels will hold the whole thing together .
 So I missed the photo of the saw cut (sorry).
 Make the holes just big enough to take the zip ties.


